LeadPages WebinarJam Integration
by Dave | integration

UPDATE: Apparently WebinarJam DOES have an API: http://webinarjam.com/download/apiguide.pdf Using the API should supersede any “hack” method (including yours truly shown here as it no longer seems to work).
… so your clients signup once and are automatically added to your Webinarjam when they signup through LeadPages. Or said another way, one click signup.
To be honest, this isn’t the “prettiest” way to do things – it involves hosting your LeadPages thank you page on your own site AND making some edits to it. However, with a little creativity we can overcome the limitations that WebinarJam presents by not having an API for registering (WebinarJam if you are reading this, consider this a feature request – provide an API).
Workflow
The workflow involves: your email autoresonder – we are using Ontraport for this demonstration, LeadPages, WebinarJam and your website.
Autoresponder
- Create an Ontraport Sequence
- Create an Ontraport Smart Form
LeadPages
- Create a LeadPages signup page
- Integrate with Ontraport – HTML Copy / Paste
- Create a LeadPages thank you page
- Install LeadPages thank you page on your web server
WebinarJam
- Create a WebinarJam webinar
- Get the Advanced Custom Registration Hotlink
Your website
- Add some php code to the Leadpages thank you page on your server
- Add the WebinarJam hotlink to your thank you page
Autoresponder
We are using Ontraport for this. Regardless of which autoresponder you are using, what you are accomplishing in this step is to get the autoresponder HTML code so you can add it to LeadPages signup page in the next step.
Create An Ontraport Sequence
Inside your Ontraport account select Contacts > Sequences > New Sequence.

Next, you decide if you want the sequence to be a STEP SEQUENCE or a DATE SEQUENCE. For this example, I am going to choose STEP SEQUENCE.
The only thing you must do is provide a Name, ex – TEST Sequence, and click Save. Come back once this workflow is complete and add an email or SMS or Task or Postcard or etc.

Create an Ontraport Smart Form
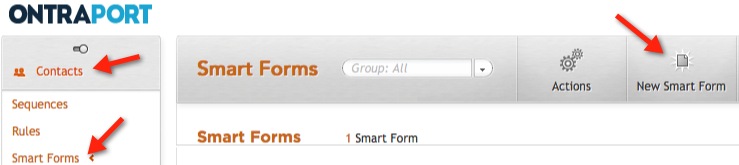
Inside your Ontraport account select Contacts > Smart Forms > New Smart Form.
Click on the Settings tab near the top. There are three things to do in the Settings section.
- For opt-in settings, I suggest leaving this as Single opt-in. You will need to provide a Custom URL. For example, http://www.example.com/thankyou.php. You will be creating this page on your web site (and no, it is not a WordPress page). It needs to be a php file. We will create this page at the very end of this workflow. What is important now is that you decide where (your domain) and what the page name will be (and it has to have the .php extension).
- In the MANAGE FORM FILLS section, you will want to choose the “Sequences – add contacts to these sequences” and add the Sequence you created in the previous step.
- In the ADVANCED section, check the box that says “Pass CGI variables to Landing/Thank you page”.
- Click Save.
It should look something like this.

LeadPages
You will be creating a LeadPages sign up / opt-in form and a LeadPages thank you page. The sign up / opt-in page will be hosted by LeadPages. The thank you page will be hosted on your web server.
Create a LeadPages signup page
I’ll assume you know how to create a Leandpages signup page. There are just a couple of things that need special attention.
First is the Opt-in form integration.
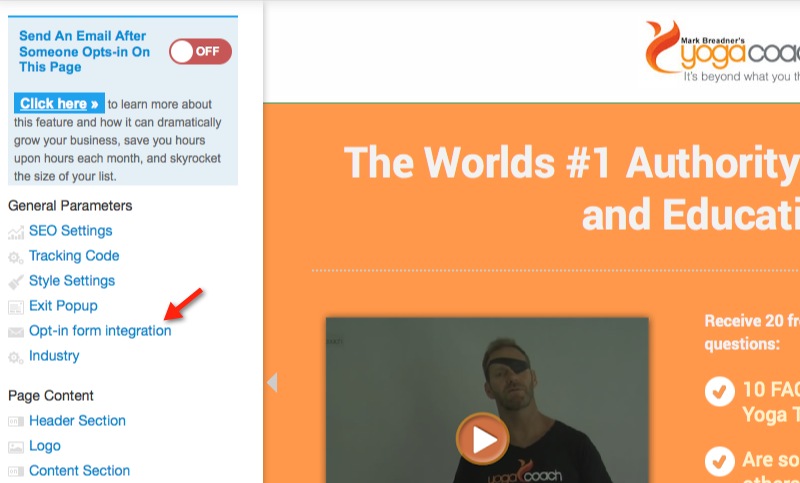
You are NOT going to use a LeadPages thank you page inside Leadpages. You are going to create a thank you page and use it on your own web server. For now, do not use the Thank you page option.
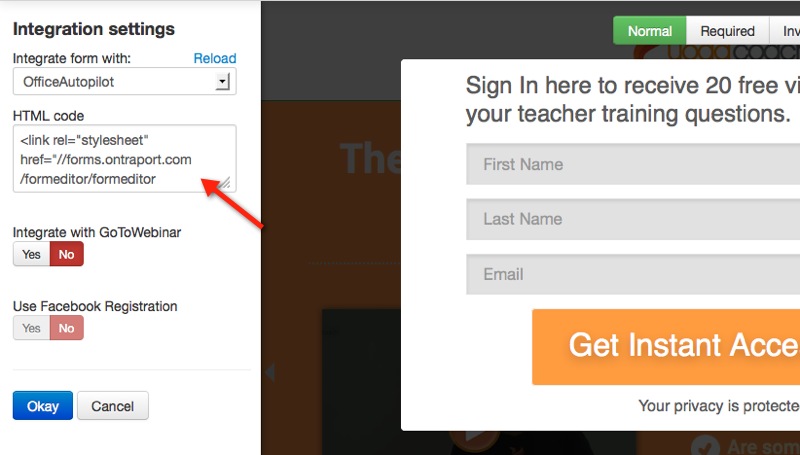
The second is under integration settings.
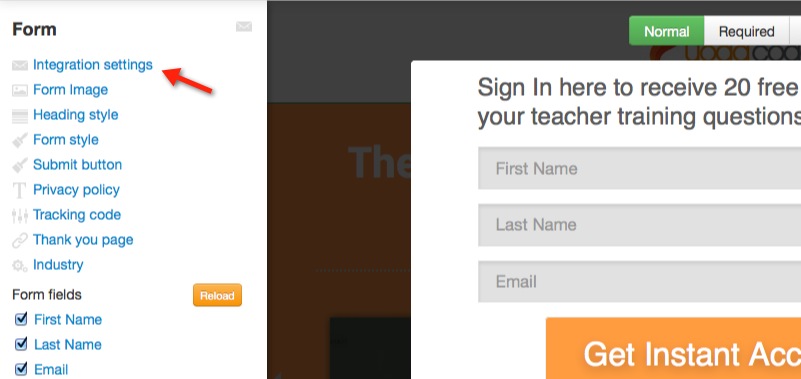
Choose the HTML Copy / Paste option and not the API integrations option. Yes, I know, this defeats some of the beautiful automation that LeadPages provides. Sigh.

Now you need to go back to your Ontraport account (or any other autoresponder account) and grab the HTML code for signing up.
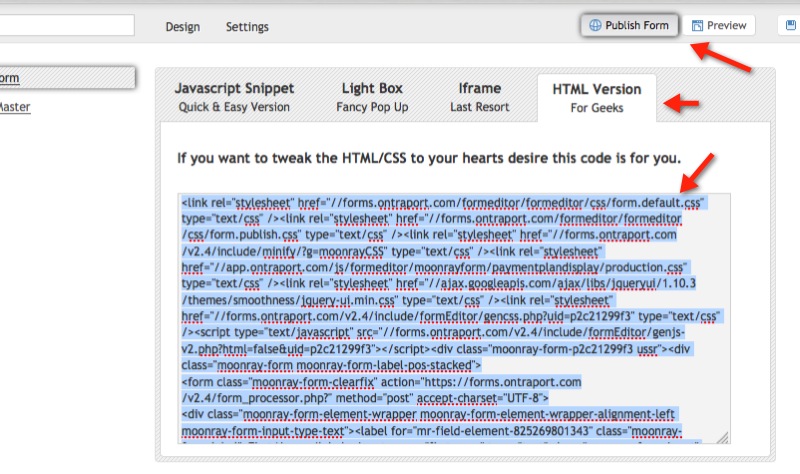
Inside Ontraport, click on Contacts > Smart Forms > your specific Smart Form > Publish Form > HTML Version For Geeks.
Highlight all of the code presented and copy it.
Return to your LeadPages account and paste in the Ontraport HTML code into the HTML code box in the Integration settings area and click Okay.
Create a LeadPages thank you page
Again, I’ll assume you know how to create a LeadPages thank you page.
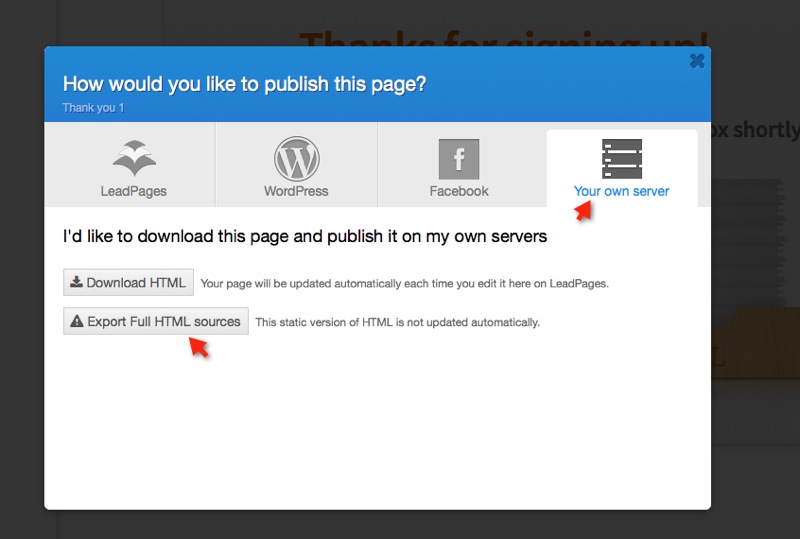
The important thing here is when you publish … you are going to publish this page on your web site.
Click Publish > Your own server > Export Full HTML sources.
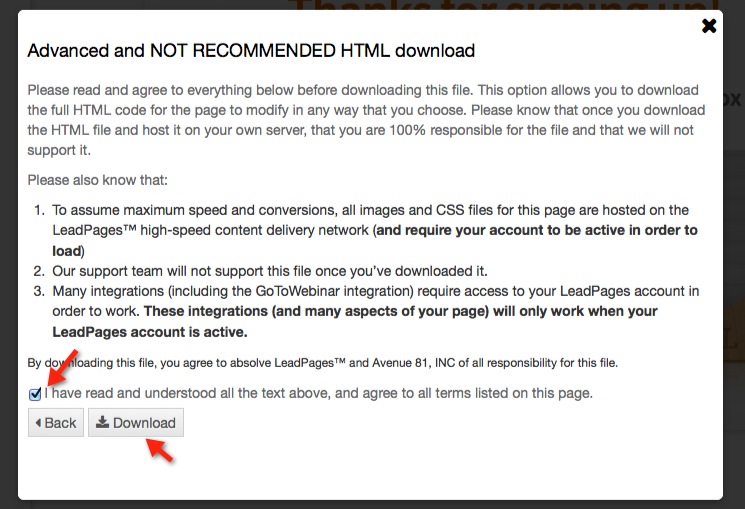
Next you will get another window with a message from Leadpages saying that you will give your first born … just kidding. No, they will let you know that you are responsible for the file and they will not be able to support you. And I agree. Once something is on your server – it is yours to maintain. There is no way LeadPages can guarantee that there will be no problems with the page when they don’t have control over the hosting.
Once all those warnings are out of the way, check the box for “I have read and understood all the text above, and agree to all terms listed on this page.”. Then click the Download button.
This will start a download to your computer. I recommend opening the file (thank-you-1.html) with your default browser. We are going to copy the HTML code to your thank you page.
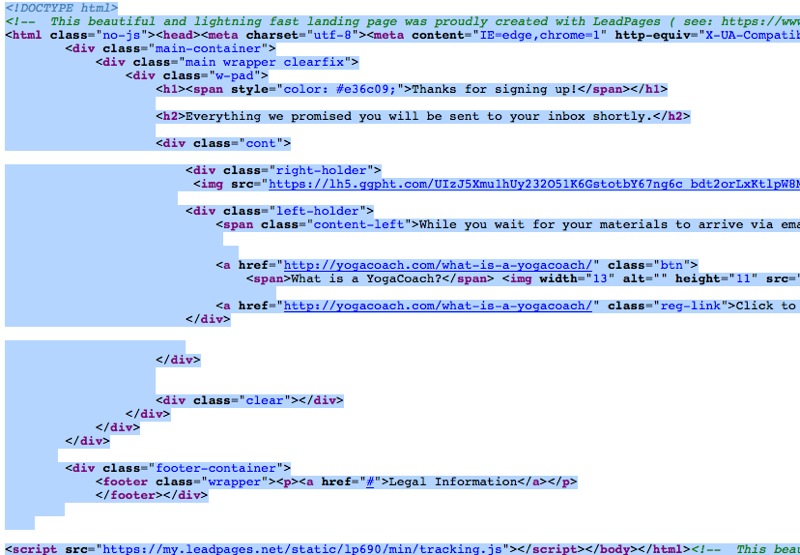
Once you have opened the thank you page, then view the source. In Firefox, this is done by right clicking on the page and clicking View Page Source.
You will get something that looks like the following. Highlight and select everything and copy. You will need this code for the thank you page hosted on your server.
Install LeadPages thank you page on your server
You will need to create a php file on your web server in the location you specified the Custom URL for the Ontraport Smart Form. For instance, thankyou.php.
Paste the LeadPages HTML code that you just copied into the newly created thankyou.php page. Save that page and take a break.
WebinarJam
Create a WebinarJam webinar
That’s about all I am going to say about that … just do it.
Get the Advanced Custom Registration Hotlink
I will say a little more about this 🙂
Click on My Webinars > Get your links and find the Advanced custom registration hotlink that looks like this:
http://webinarjam.net/webinar/webinar-register-auto.php?webicode=62c05bd92a&memberid=3342&firstname=yourname&email=your@email.com&countrycode=XXX&phonenumber=XXXXXXXXX&schedule=1
Copy that code and save it somewhere … you are going to make some slight modifications and paste it into your LeadPages thank you page.
Your Website
PHP code
You are going to add a little extra code at the very top of that page … some php code which will be used for populated your WebinarJam registration with firstname and email.
Here is the code to enter at the very top of the thankyou.php page. From the opening php tag <?php to the closing ?> tag … type that in.
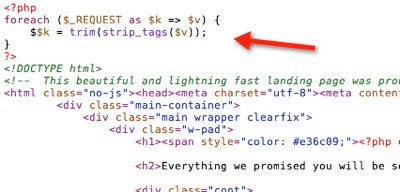
And save that file (always a good idea to save your work occasionally).
Add the WebinarJam hotlink to your thank you page
Here’s what you original WebinarJam hotlink looks like:
http://webinarjam.net/webinar/webinar-register-auto.php?webicode=62c05bd92a&memberid=3342&firstname=yourname&email=your@email.com&countrycode=XXX&phonenumber=XXXXXXXXX&schedule=1
This is what you want it to look like before you put it in your LeadPages thank you page.
<iframe src=”http://webinarjam.net/webinar/webinar-register-auto.php?webicode=62c05bd92a&memberid=3342&firstname=<?php echo $firstname; ?>&email=<?php echo $email; ?>&schedule=1 width=”1″ height=”1″></iframe>
The new code:
- Gets ride of the countrycode and phonenumber
- Adds php variables for the firstname and email
- Wraps an iframe tag around the WebinarJam hotlink and sizes it very small, 1×1.
Take that new WebinarJam code and paste it just before the closing </body> tag in your LeadPages thank you page.

Save the thankyou.php file and you are done.
Test It Out
Take your LeadPages sign up page for a test drive and make sure that your subscribers are automatically added to your WebinarJam webinar.