Facebook Conversion API Setup
by Dave | facebook

To start, you will need a Facebook Business Manager and Facebook Pixel
Facebook Business Manager
If you don’t have a Facebook Business Manager, your will need to create an account.
Go to https://business.facebook.com/overview.
Click Create Account.
Enter your business name, your name and email address. Click Next.
Enter your business details and click Submit.
Facebook Pixel
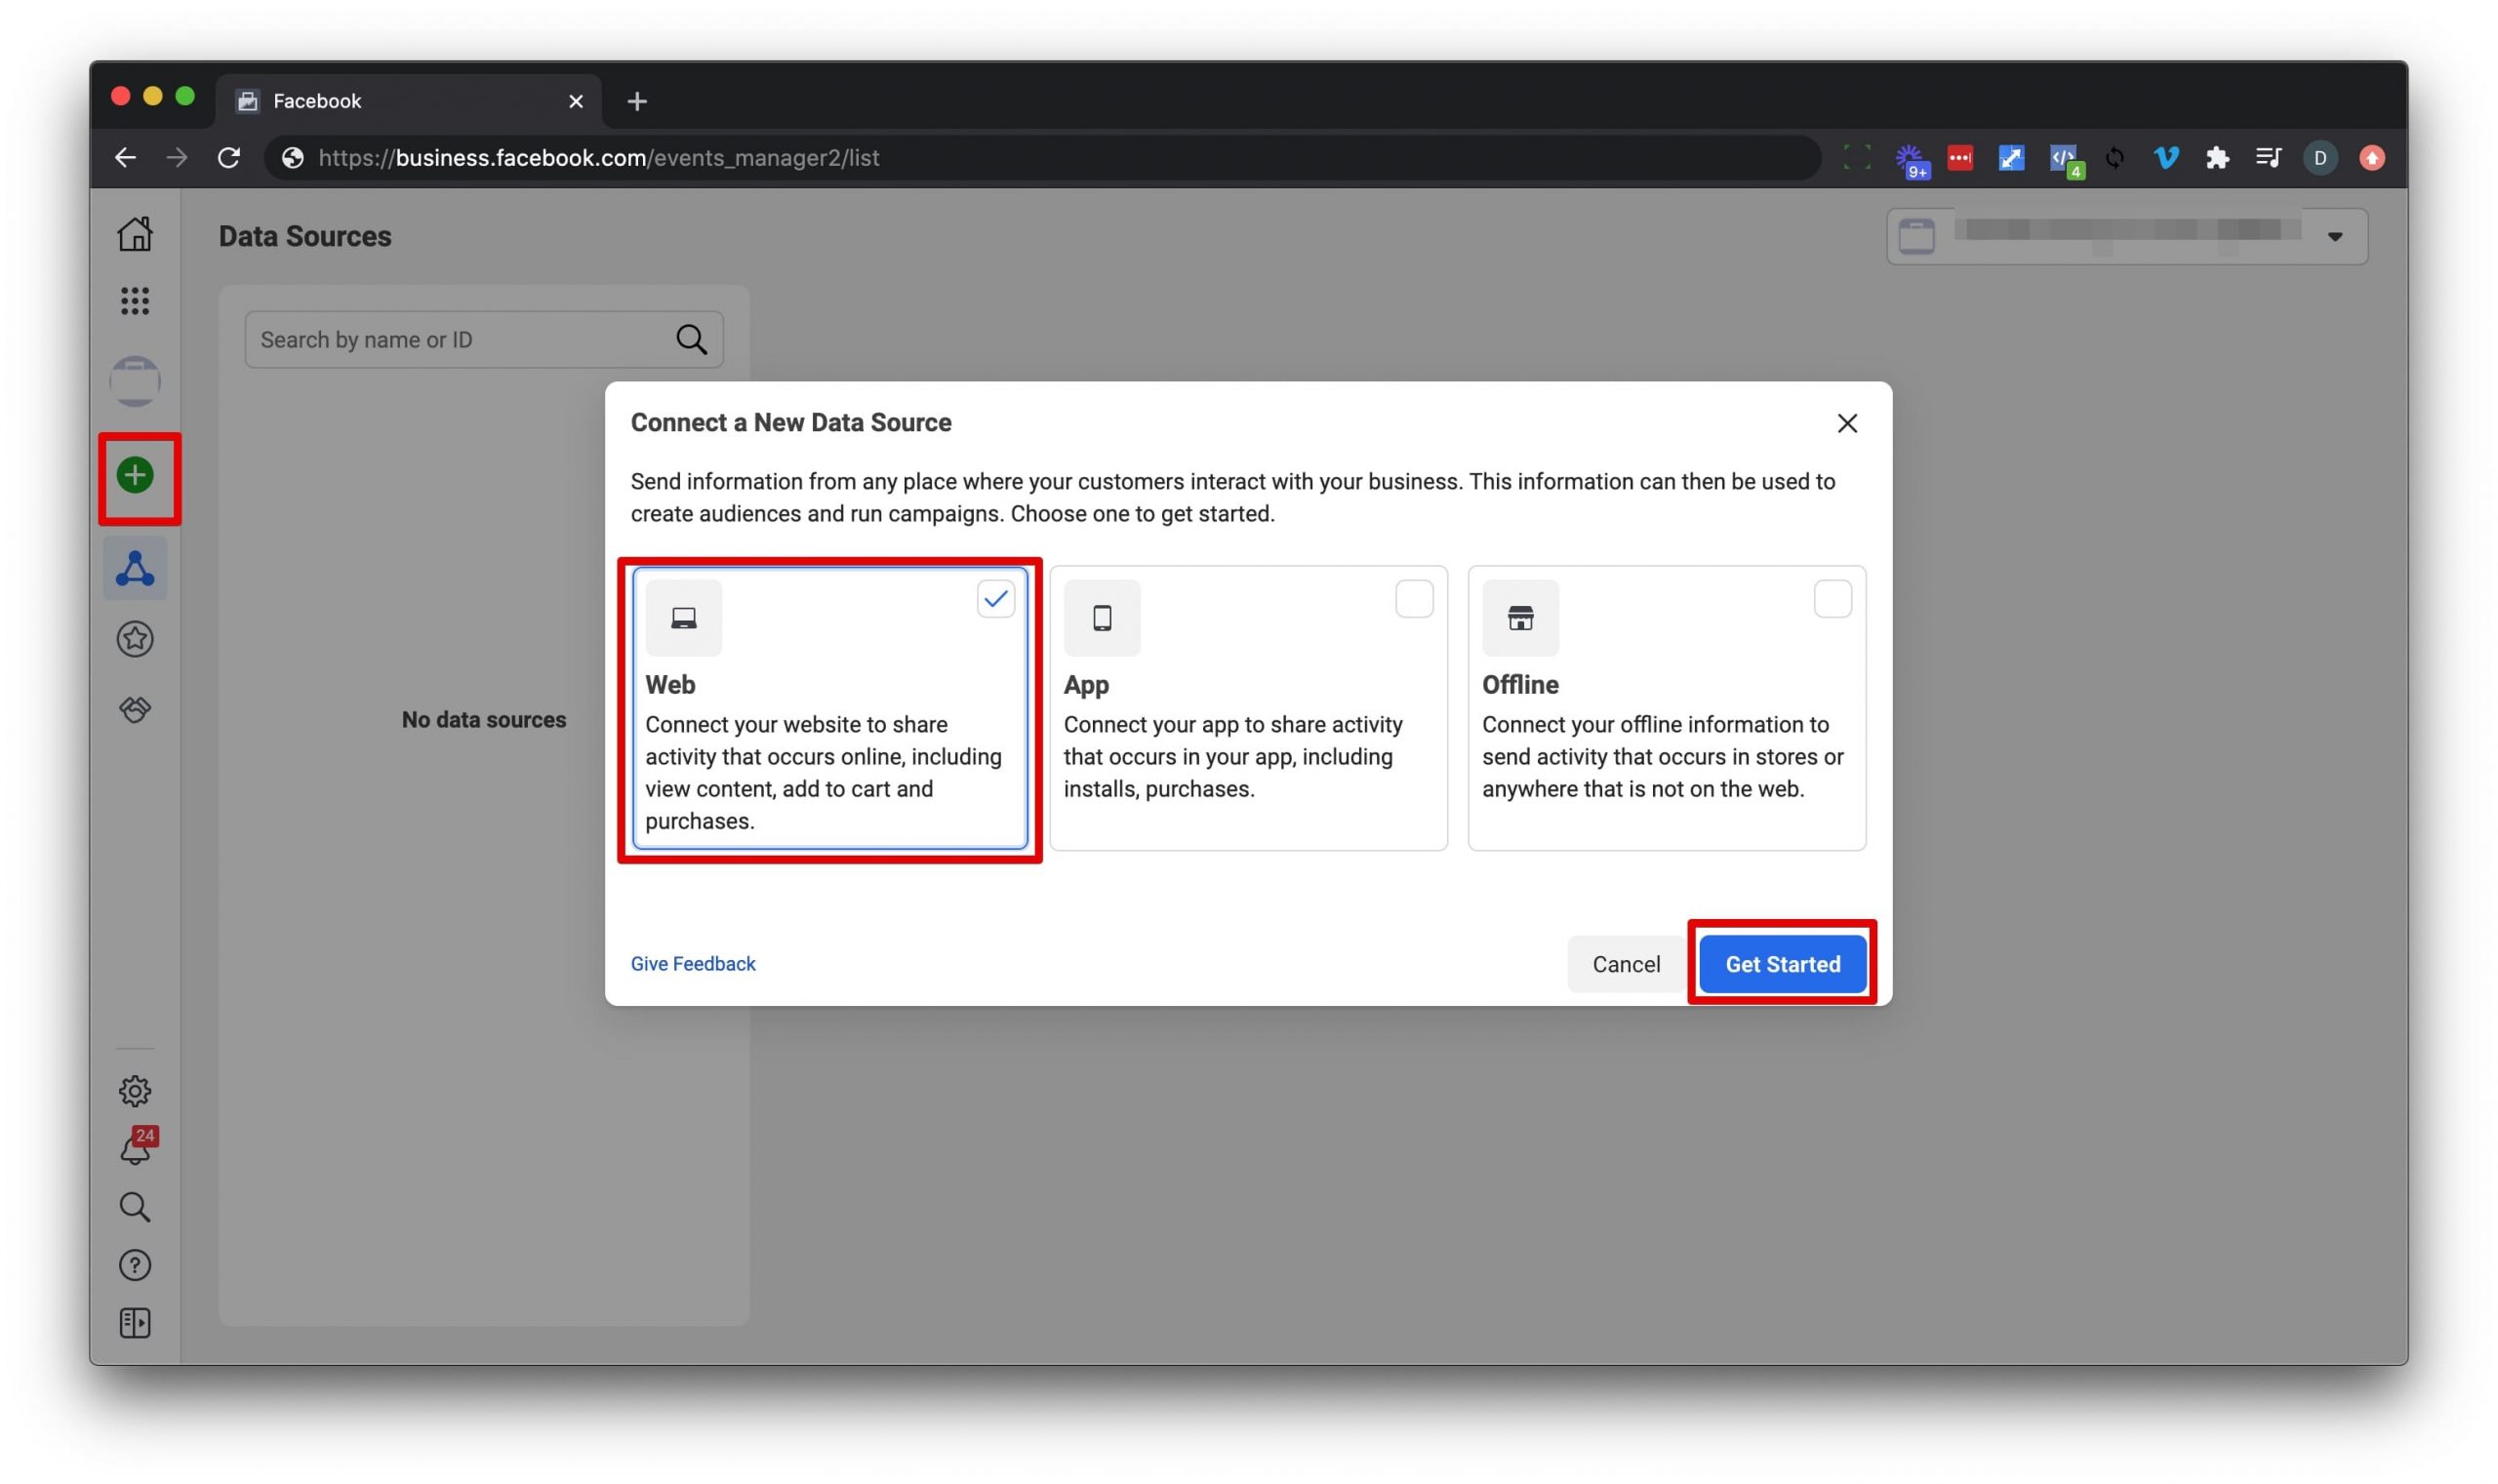
Go the the Events Manager.
Click the green button to connect a data source and select web.
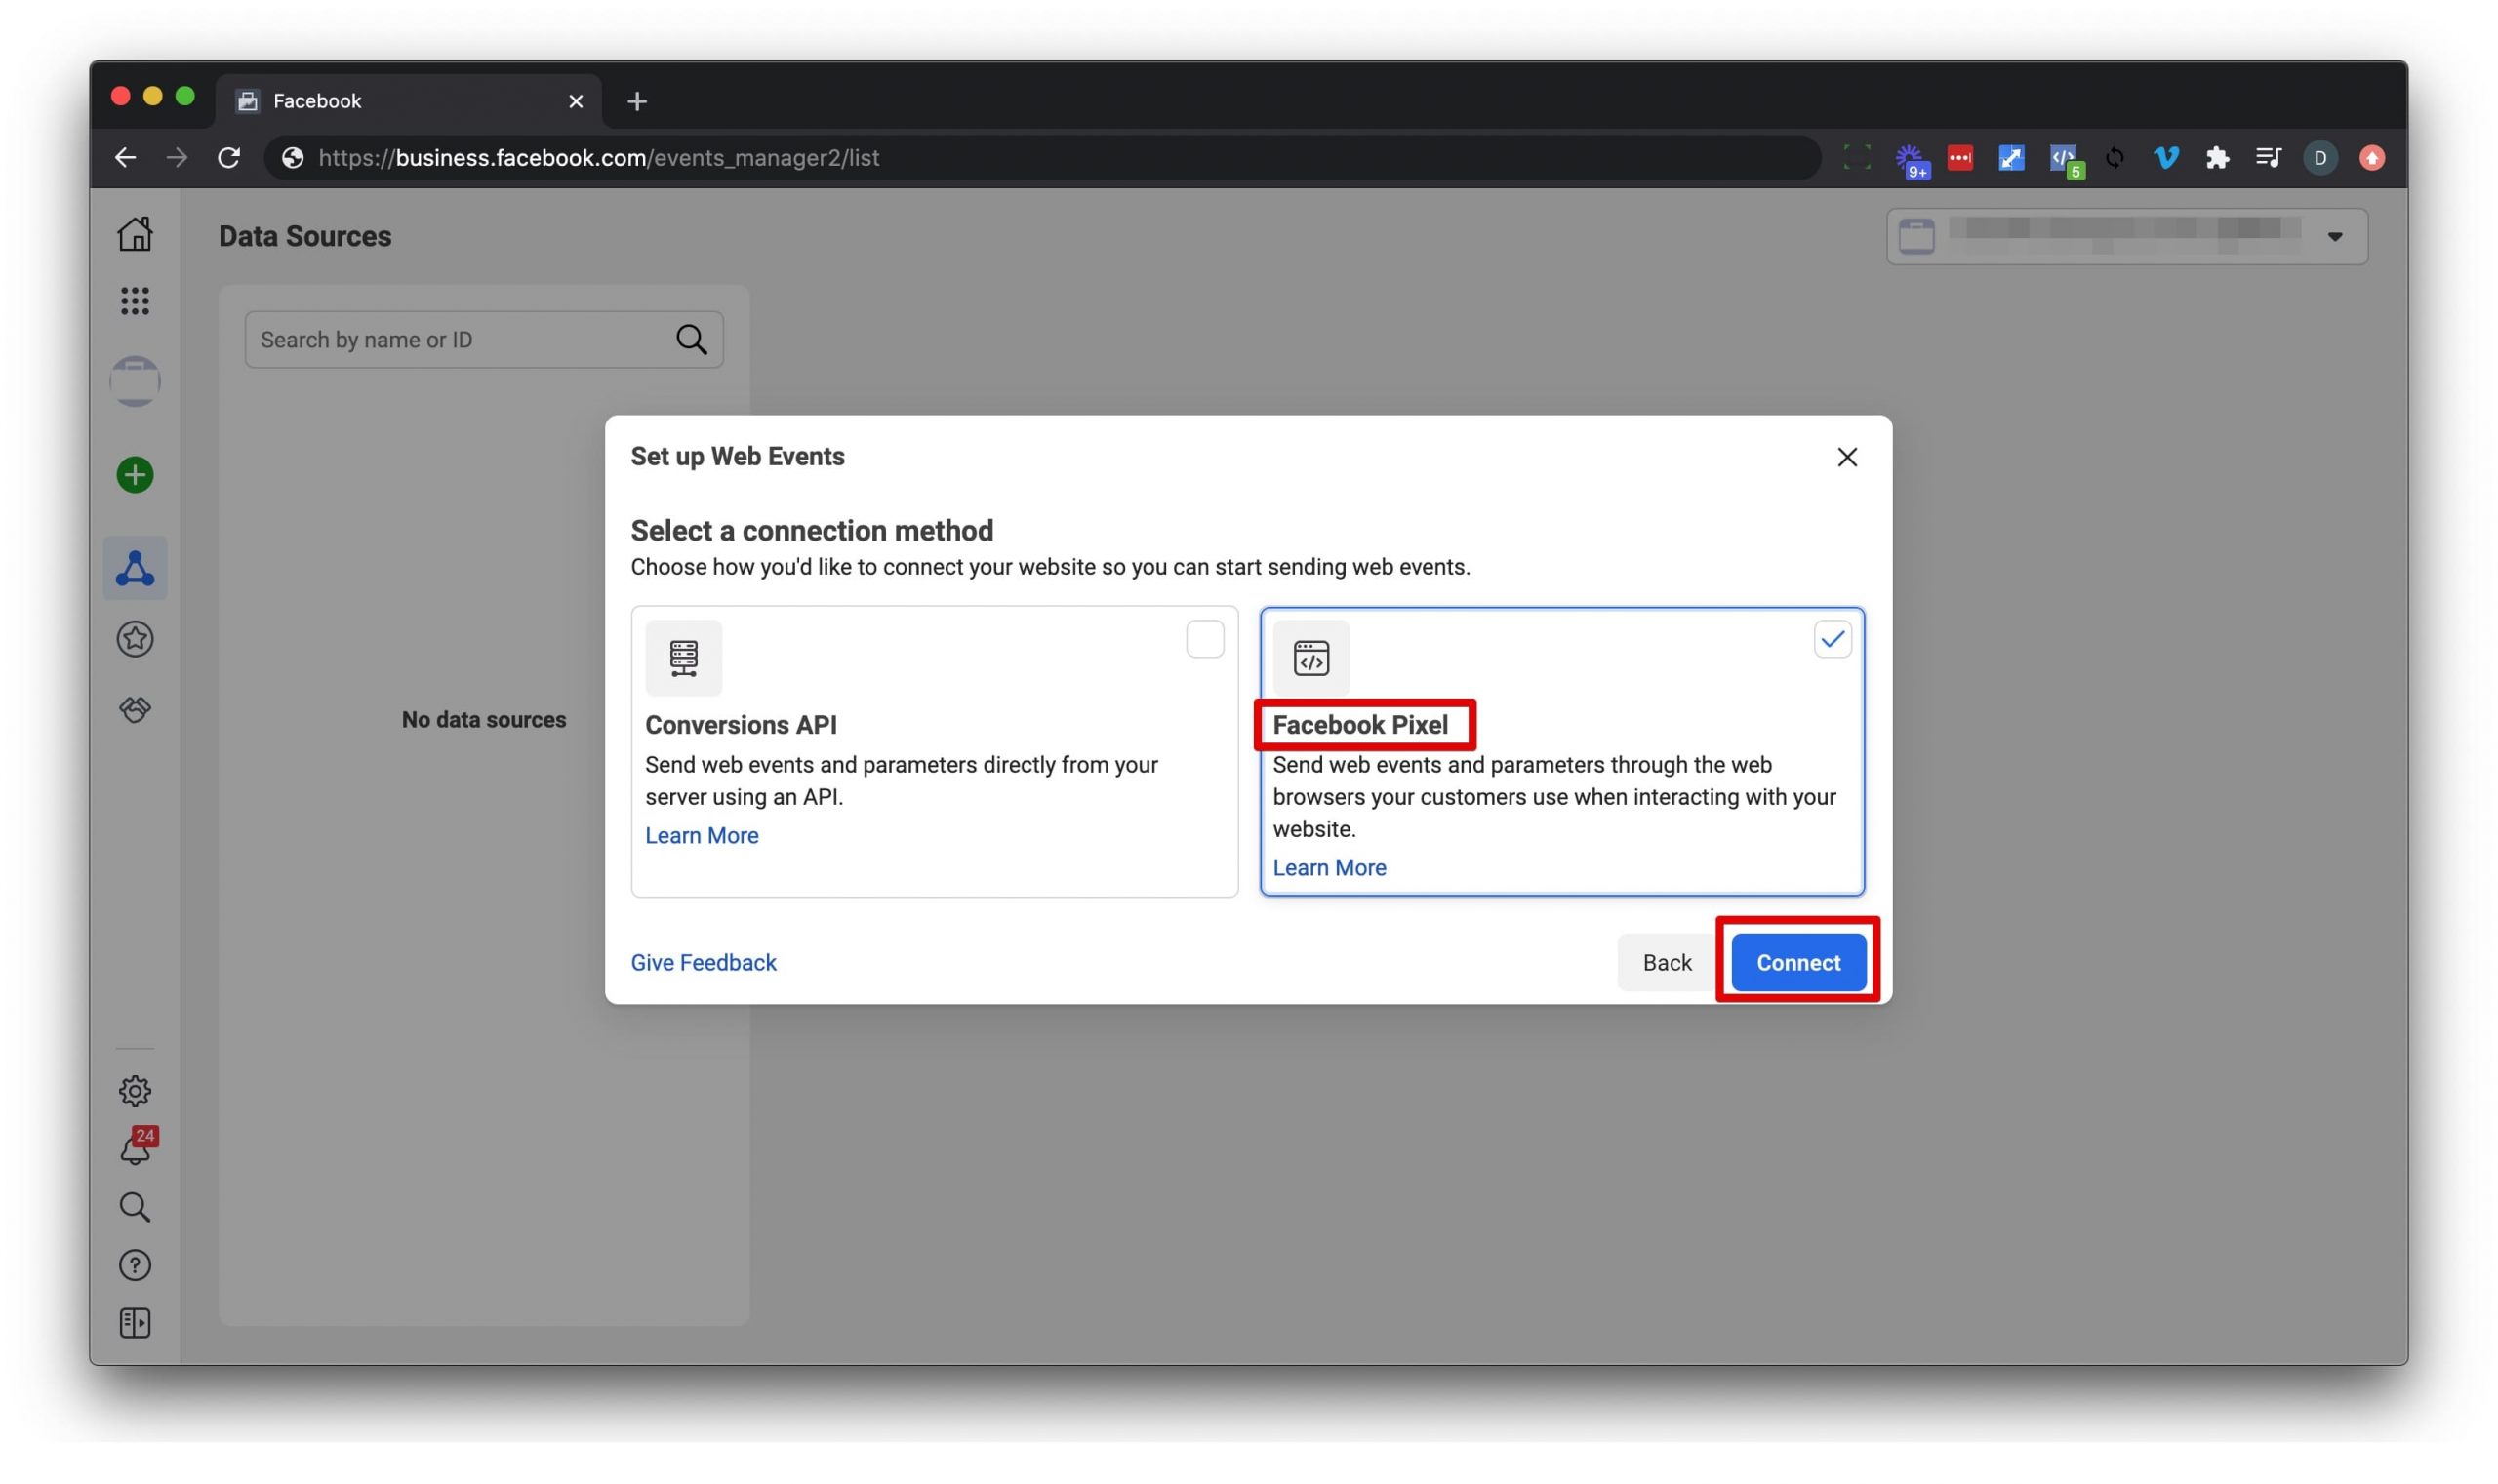
For Web Events choose Facebook Pixel and click Connect.
Provide a name for your pixel and optionally provide a website url.
Facebook will check to see if your site was set up using one of their integration partners, such as WordPress, Shopify or Squarespace. This makes it easier to get your pixel installed.
![]()
Install Facebook Pixel
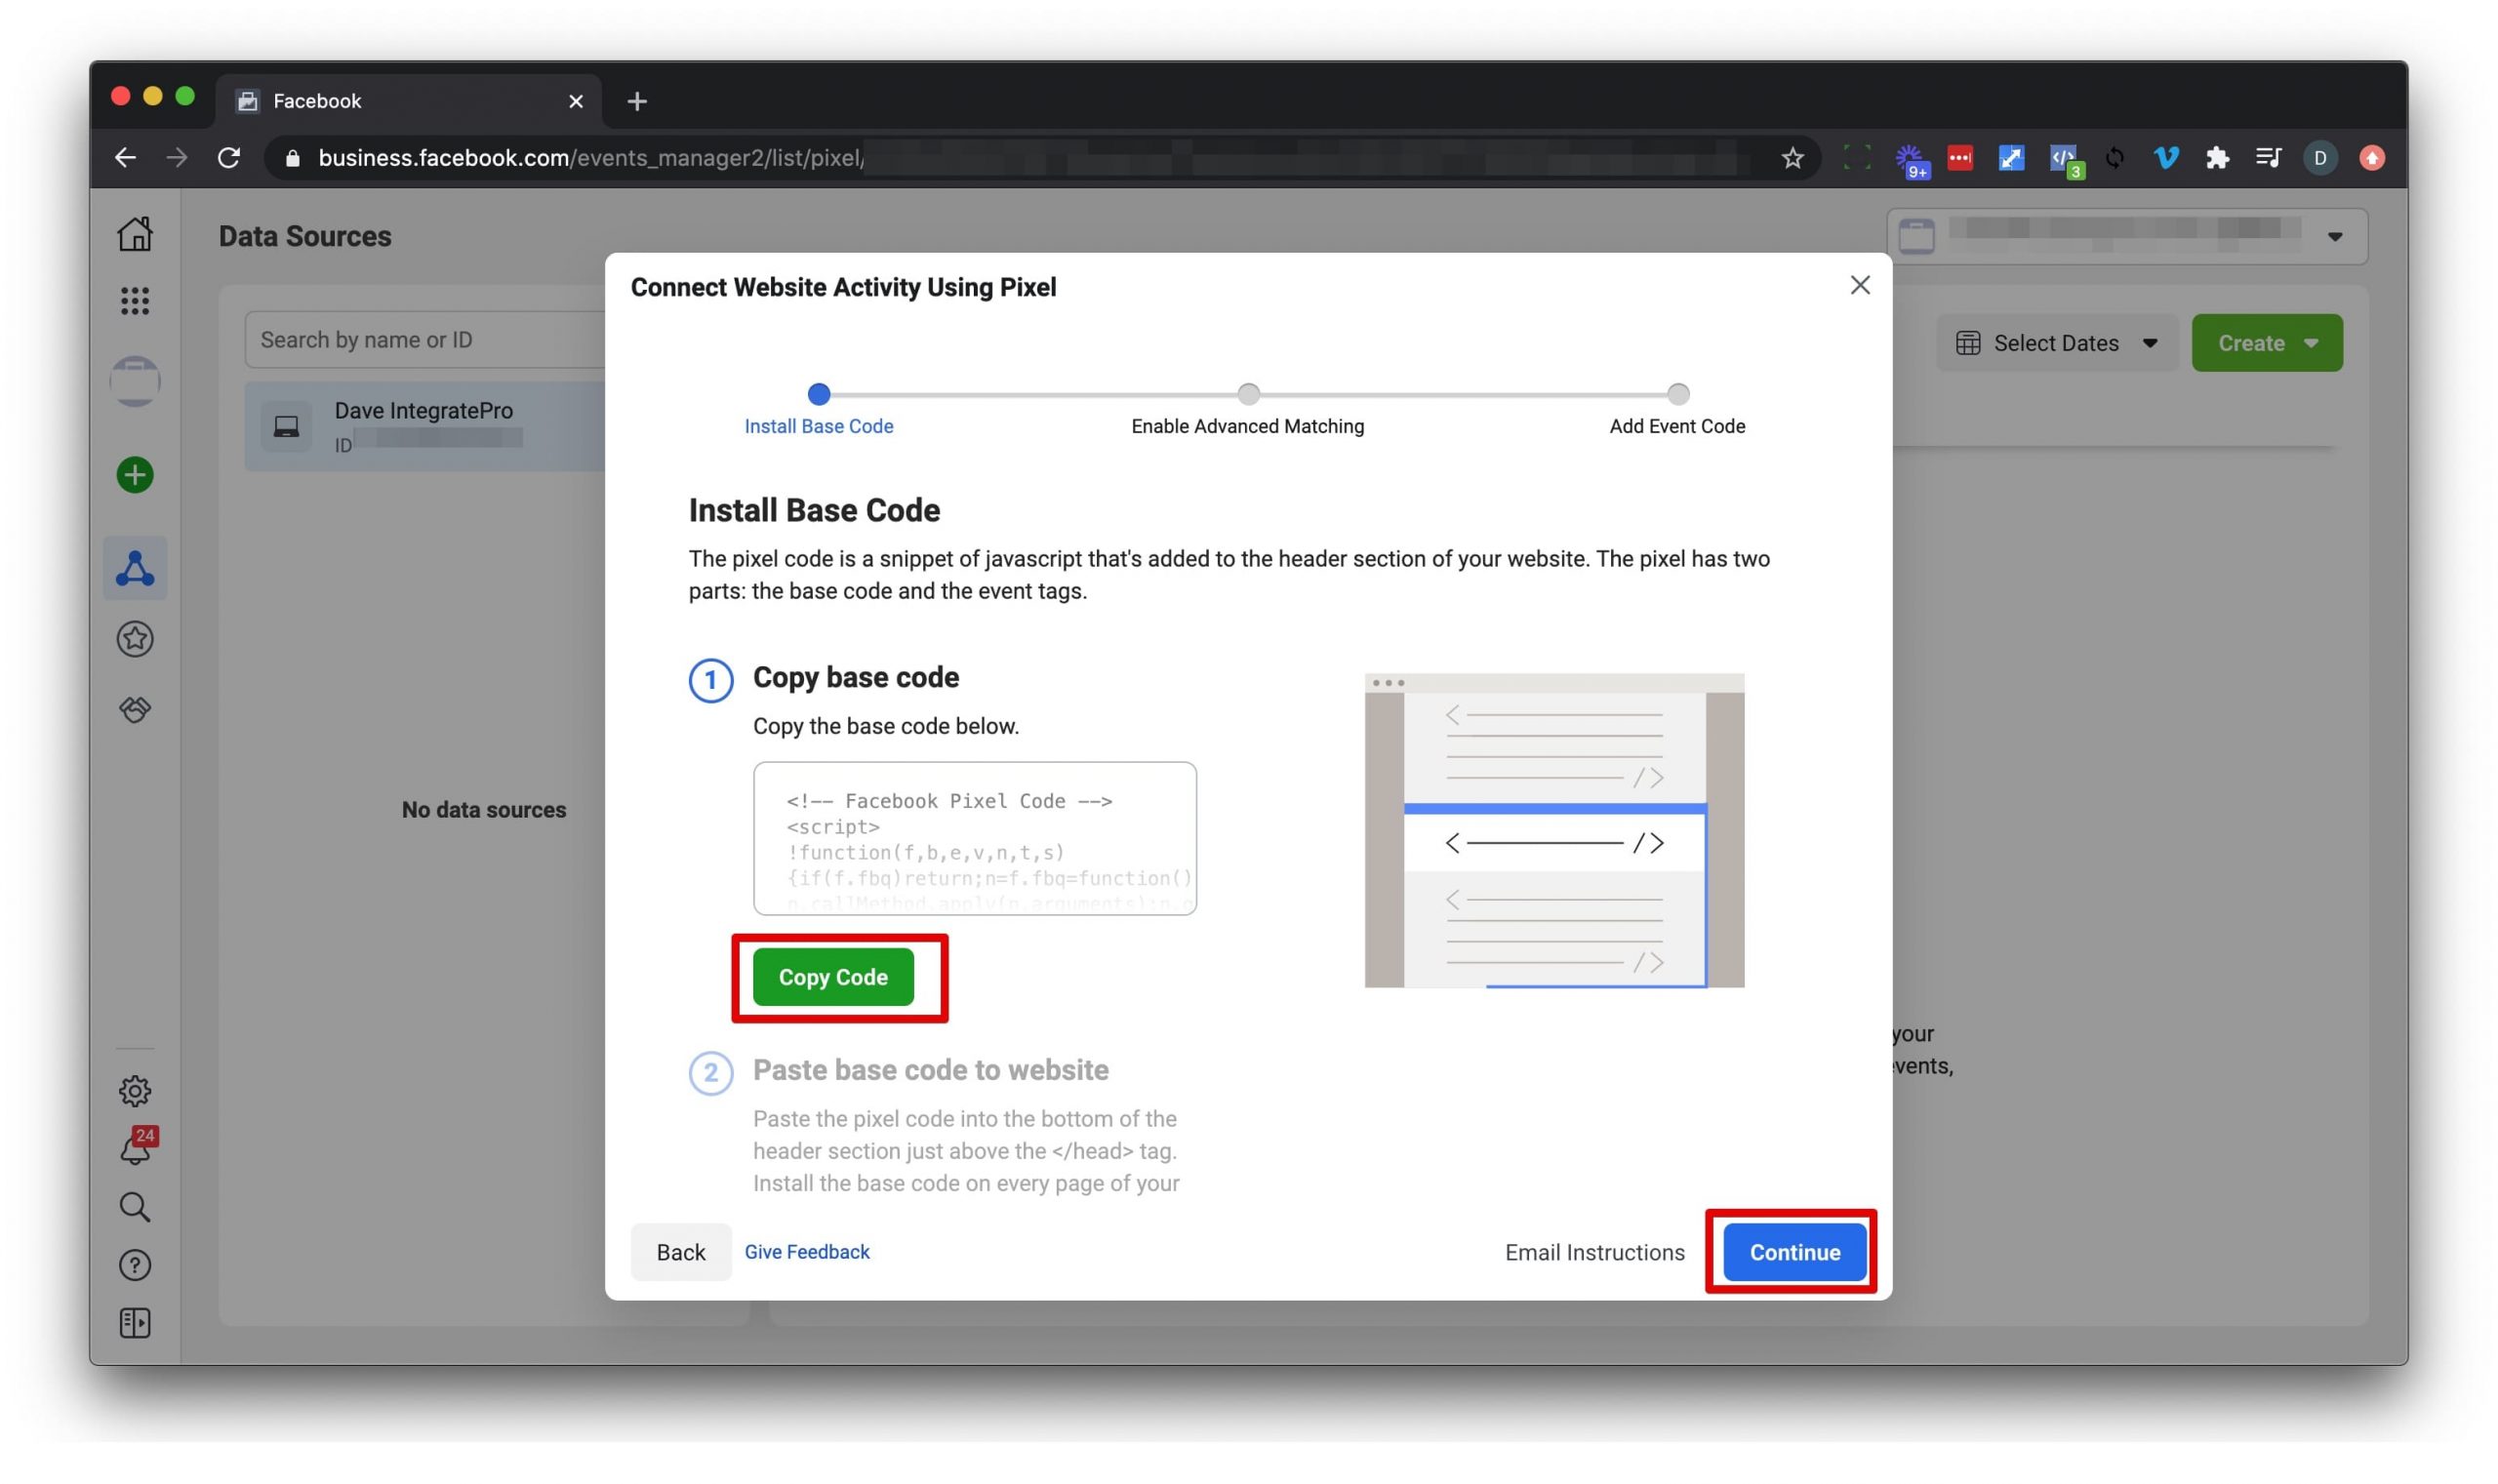
Next, you will be prompted to install the Facebook pixel on your website.
Click “Install code manually”.
![]()
Copy the base code and add it to each page on your website before the closing </head> tag.
If you are using WordPress, consider using a WordPress plugin for Facebook or using Google Tag Manager.
Click Continue.
Visit your website with the Facebook pixel installed to trigger a PageView.
Turn on Automatic Advanced Matching and accept the default (all).
Click Continue.

Close the Open Event Setup Tool.
Events Manager
From your Events Manager page, click on Settings for the Facebook pixel you just created.

Scroll down till you find the Conversions API section.
Click Create Access Token.

Follow the guided creation by clicking Next till you get to Set Up.
Click Set Up.
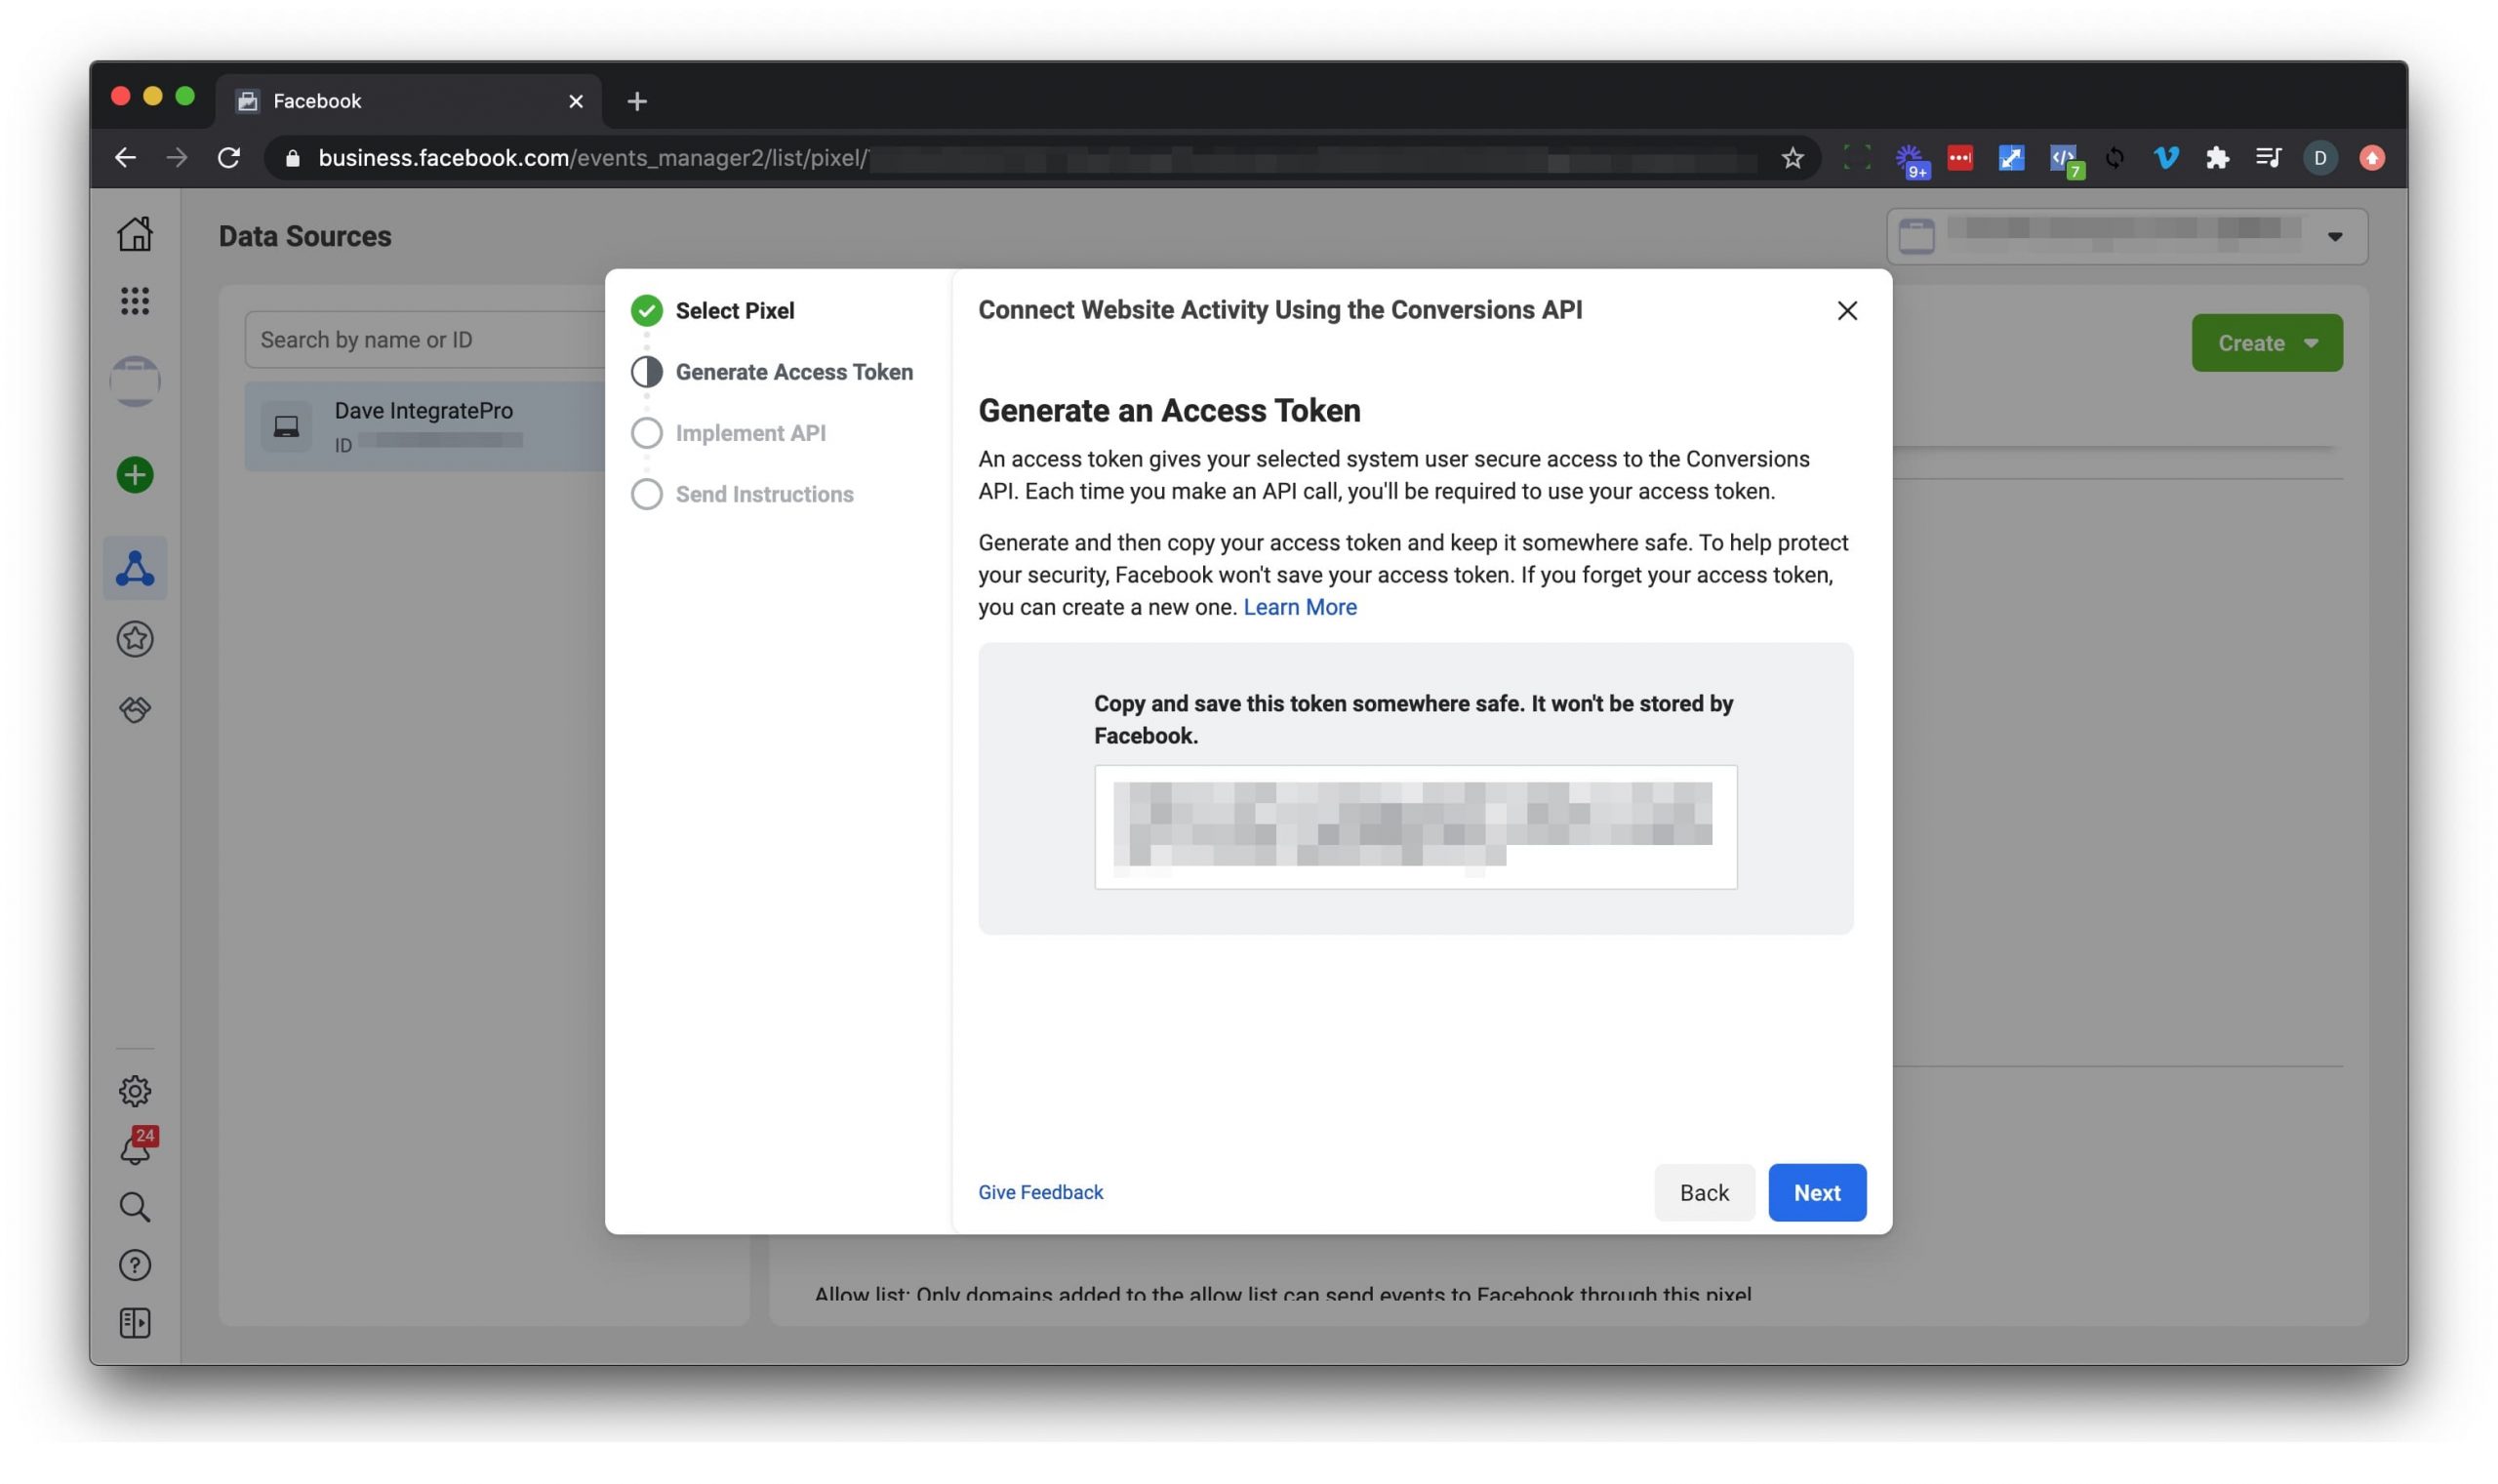
Select your pixel and click Next.
![]()
Click Generate Access Token.
Copy the token and save it.
Click Next.
Click Done.
Graph Explorer
Open a new tab and visit https://fb.me/graph-explorer.
Paste in the access code you just generated into the Access Token field.

Go back to Facebook Business Manager and copy your pixel id.
![]()
Go back to the graph explorer and replace the content in the top text box, me?fields=id,name with your pixel id following by forward slash then events, ex – 348408363171417/events.
![]()
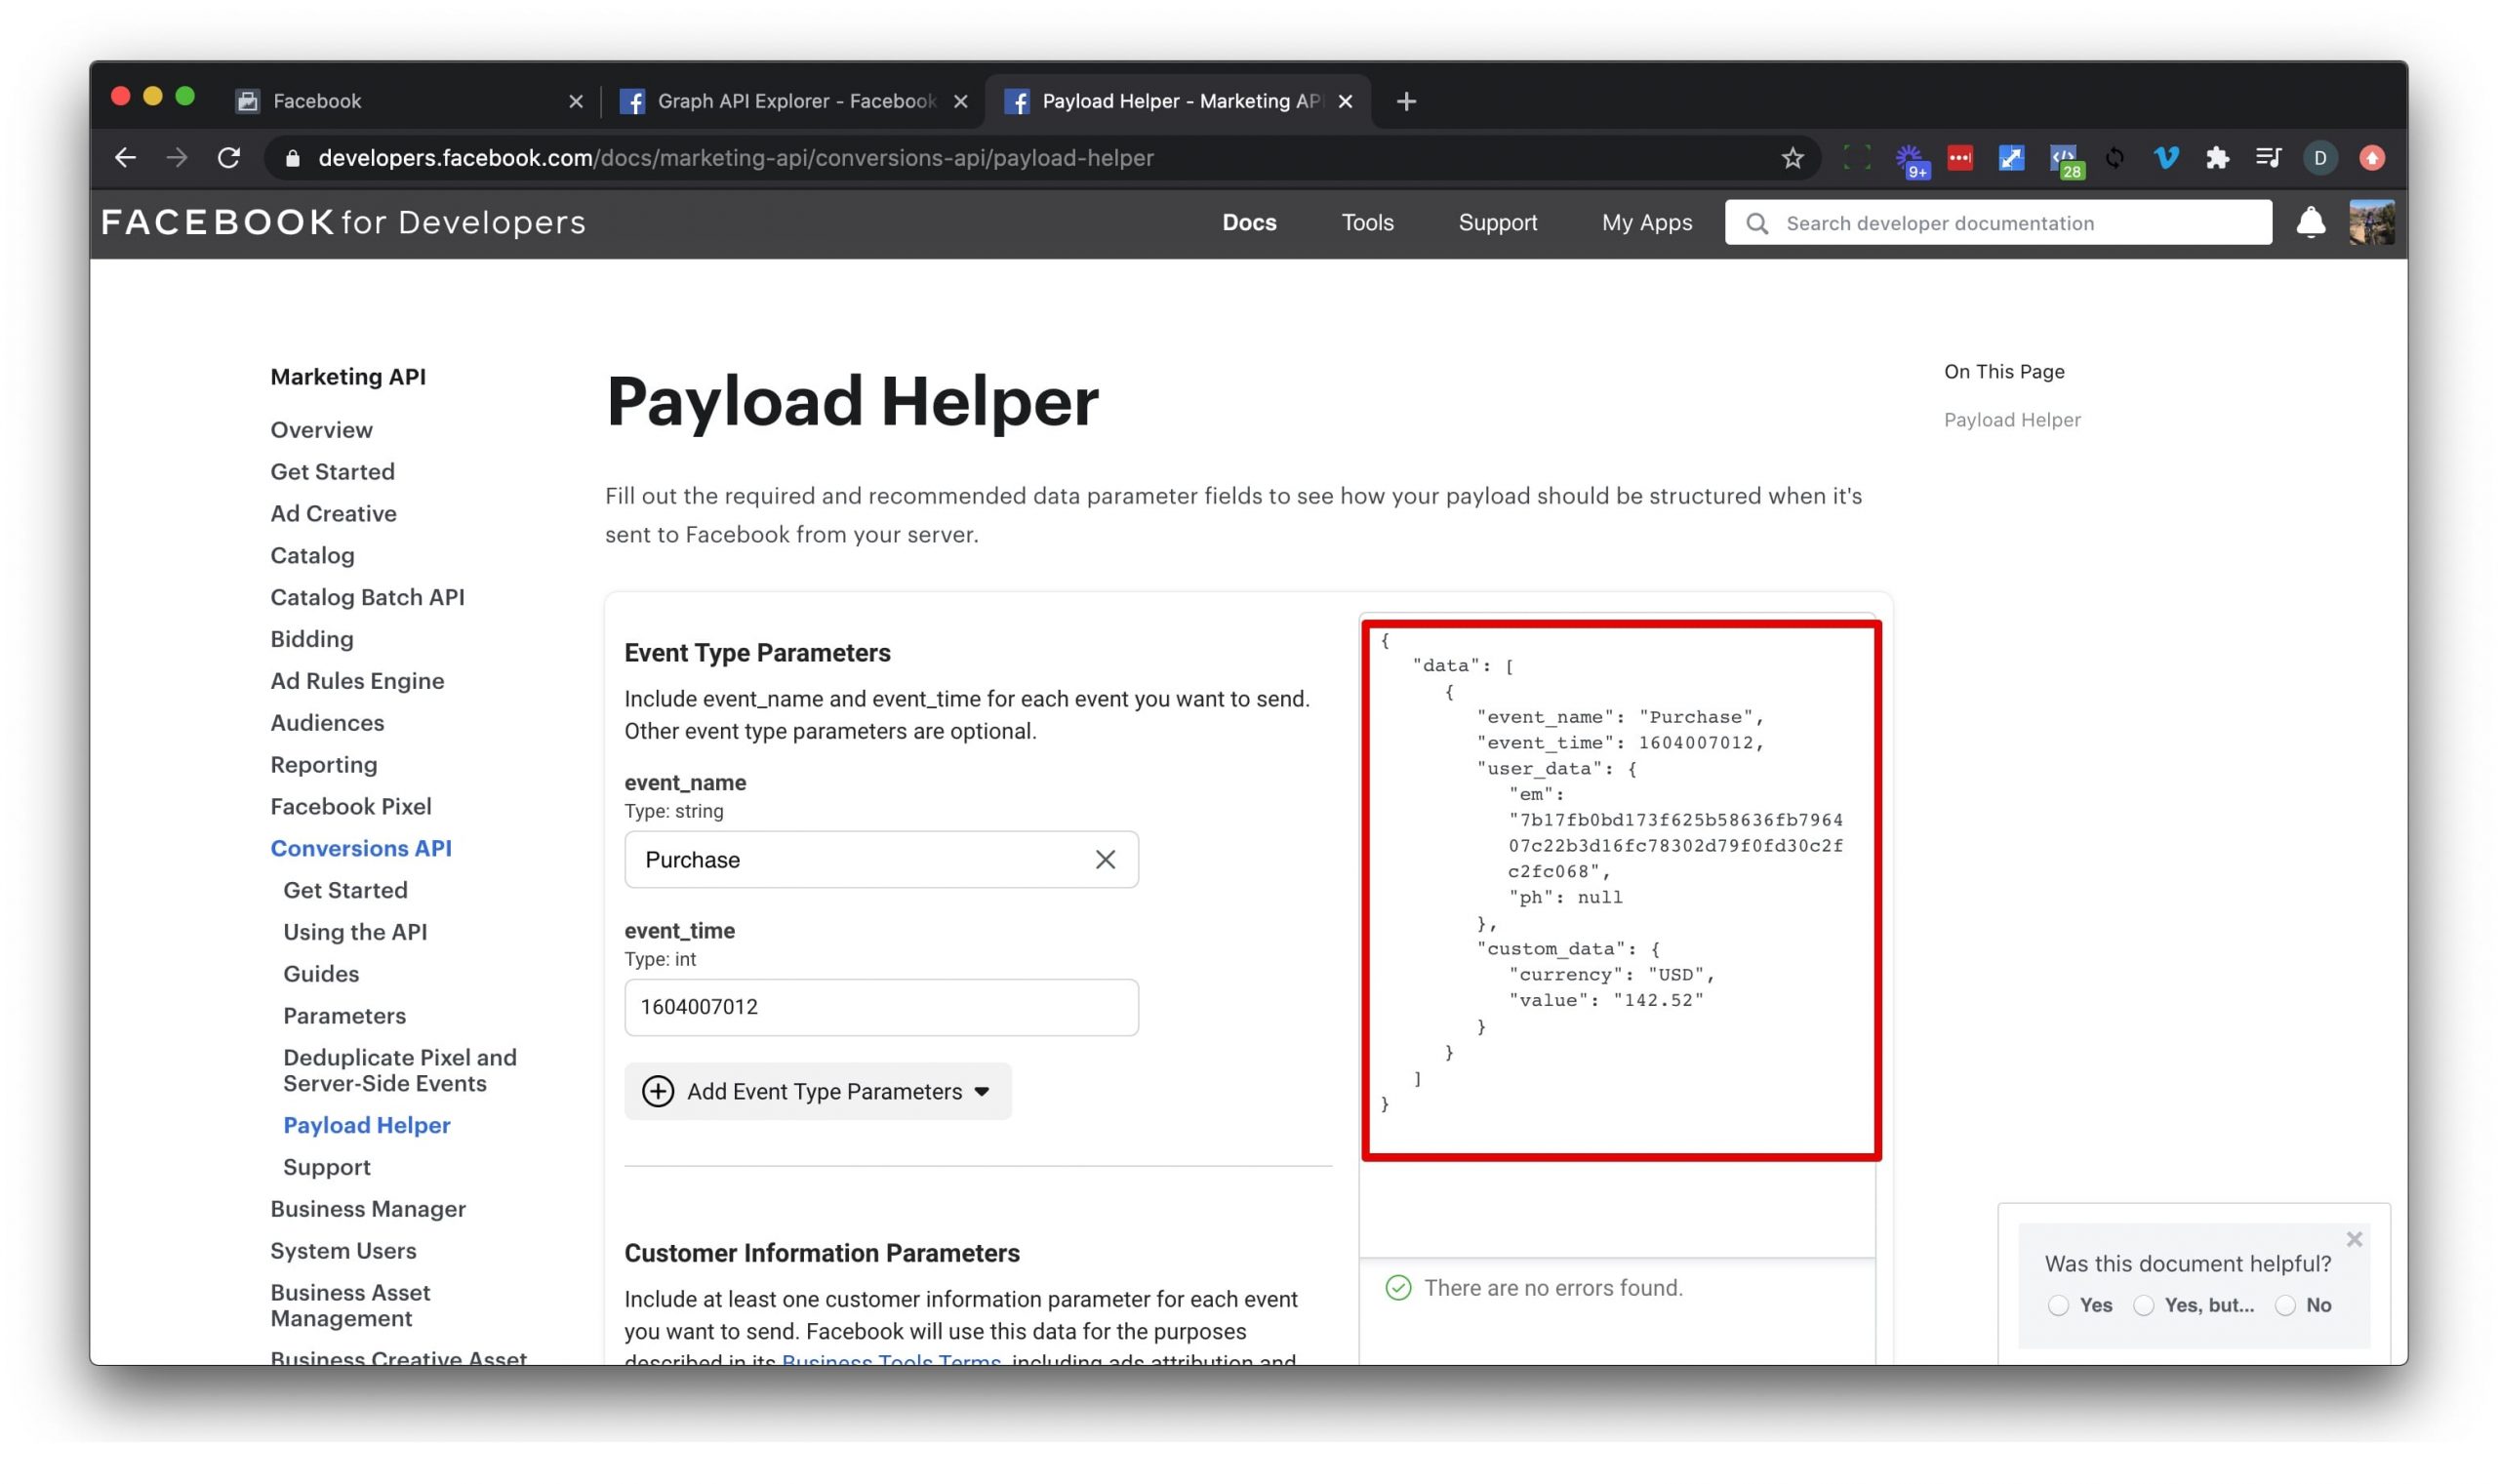
Open a new tab and visit https://fb.me/payload-helper.
Copy the data from the box on the right side of the page.
Go back to the graph explorer and replace GET in the upper left hand corner with POST and then click on JSON.
Paste in the data below on the left side to replace anything that is currently in there.
After the last closing square bracket in the data you pasted in (line 15), add a comma, new line then "test_event_code": "".

Go back to the Events Manager, click Test Events ad copy the code in the Test Server Events section.

Go back to the graph explorer and paste in the copied code between the two “” after test_event_code, ex – "test_event_code": "TEST95532".
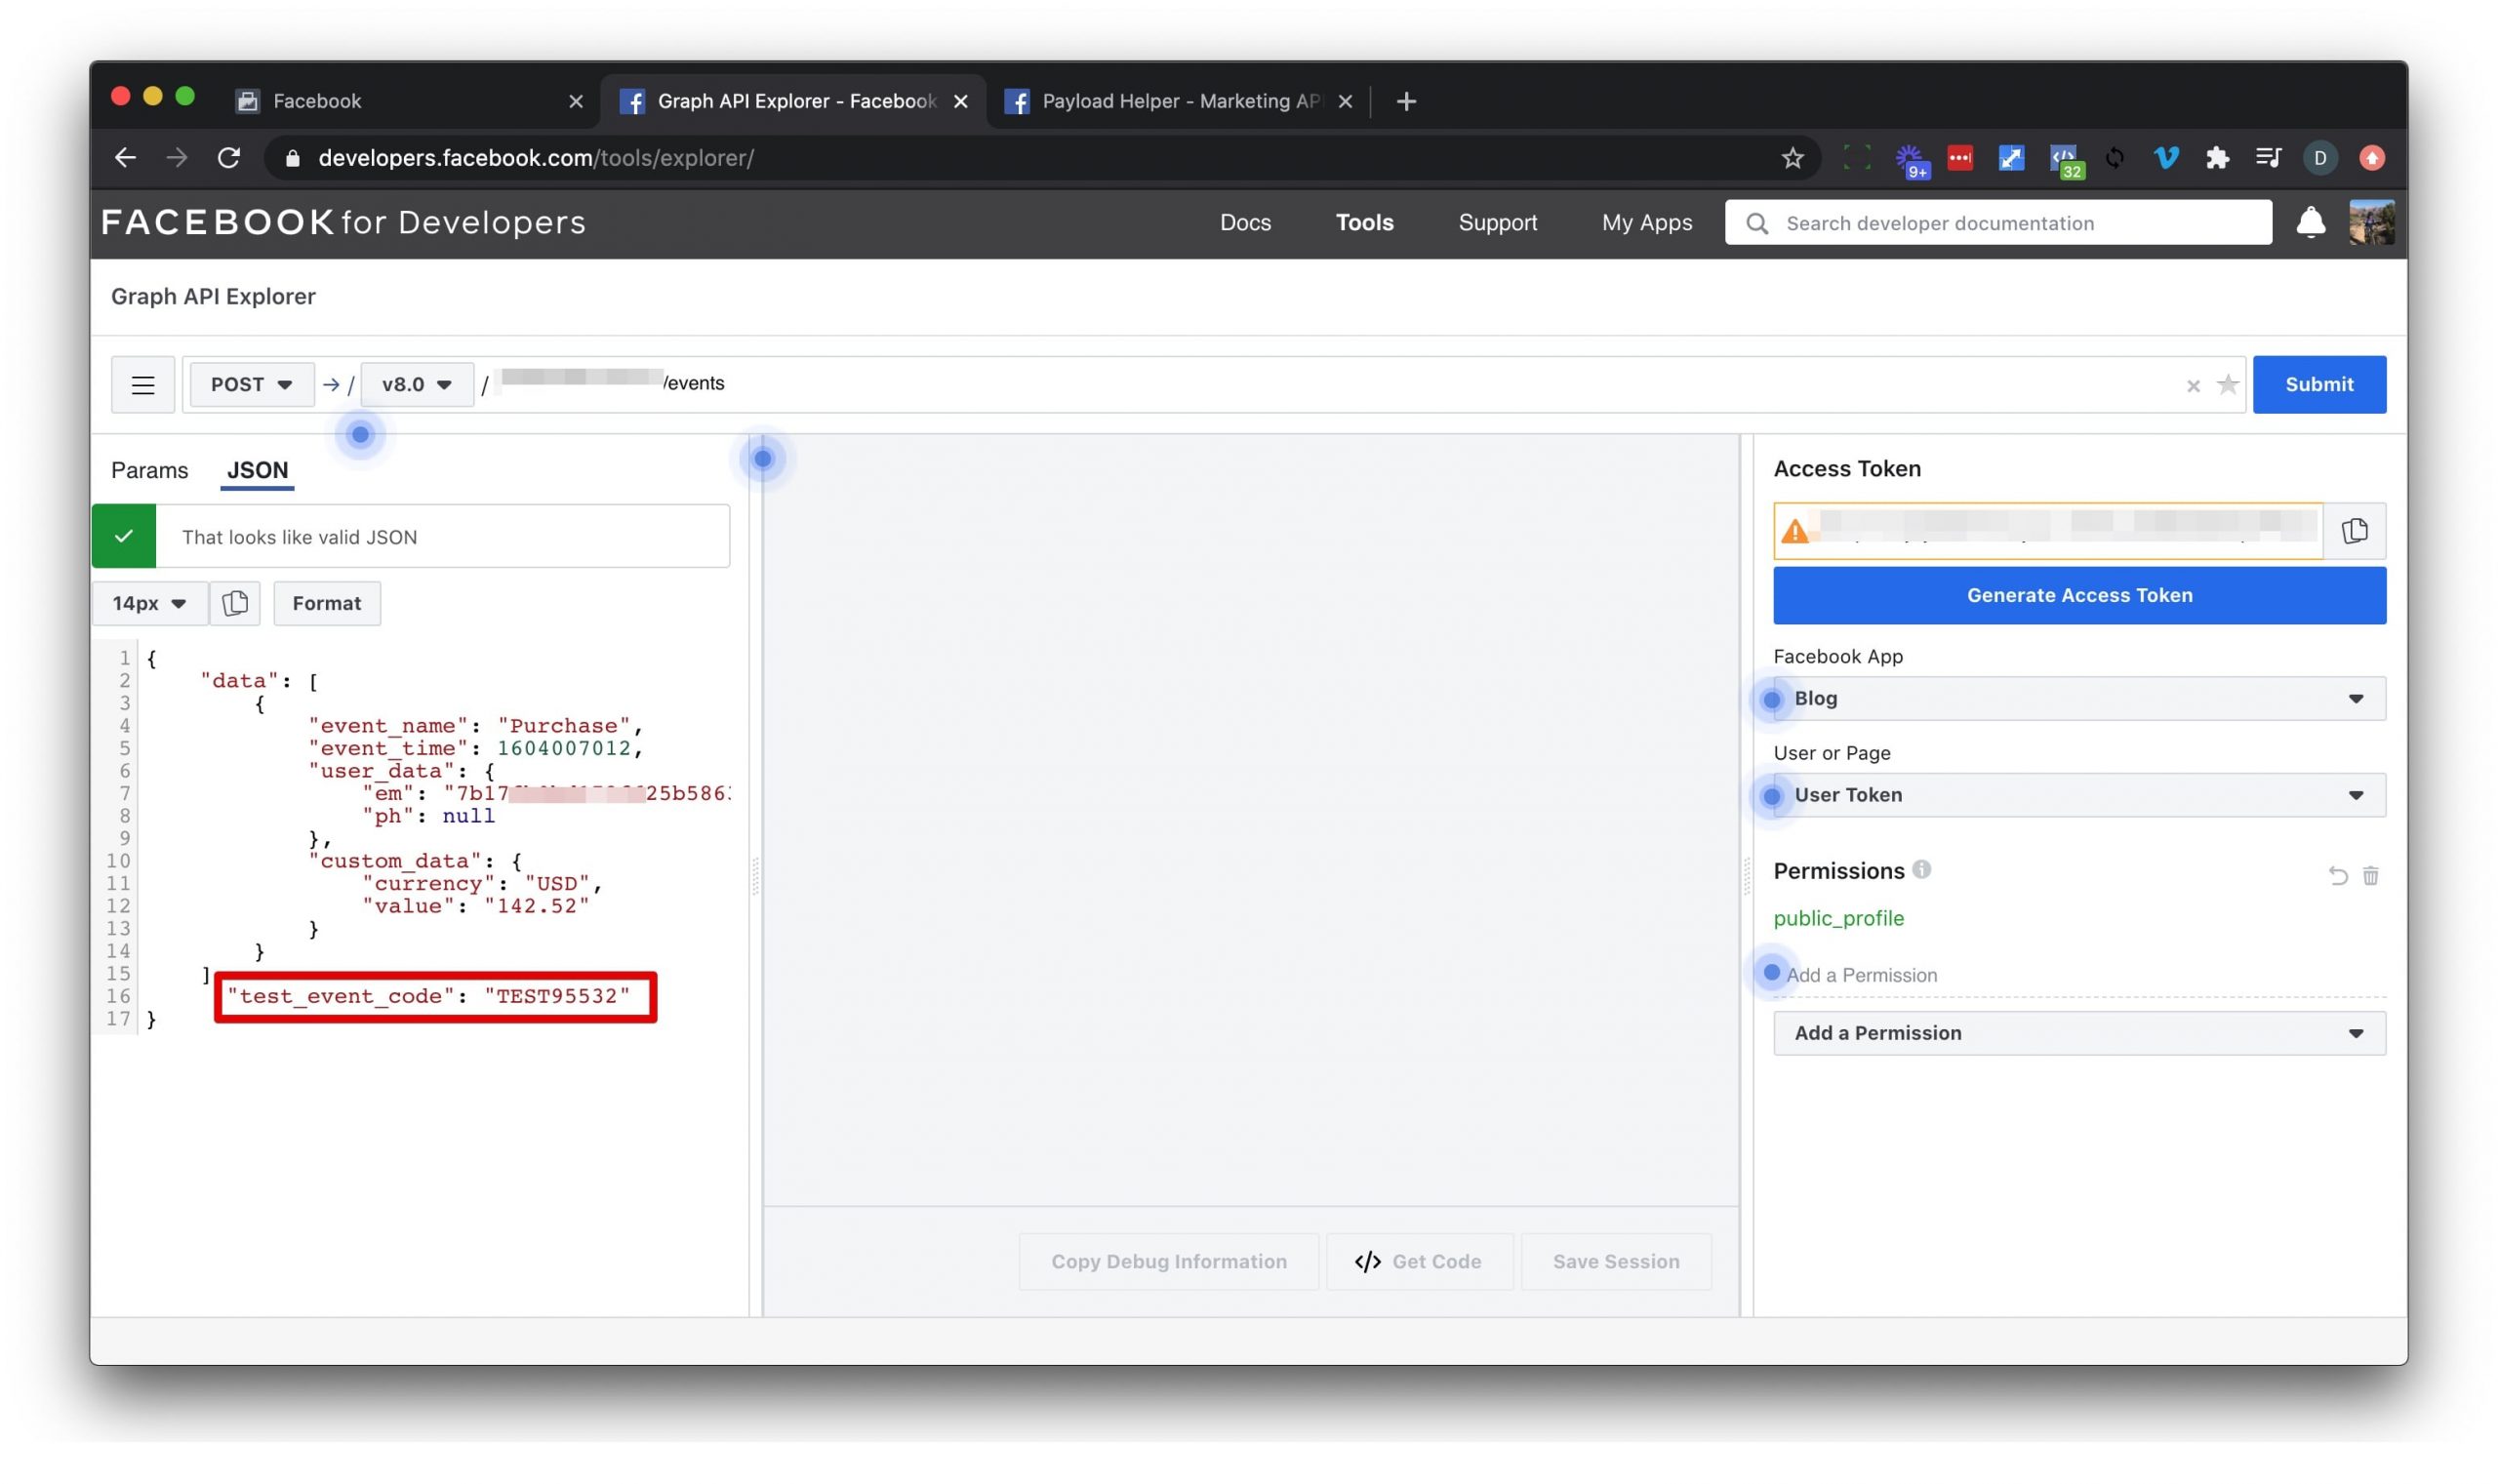
Click Submit in the upper right corner.
If successful, you will receive a message that looks like this:
{

"events_received": 1,

"messages": [

],

"fbtrace_id": "AREYOURGREAT-YesIam-Hoorah"

}
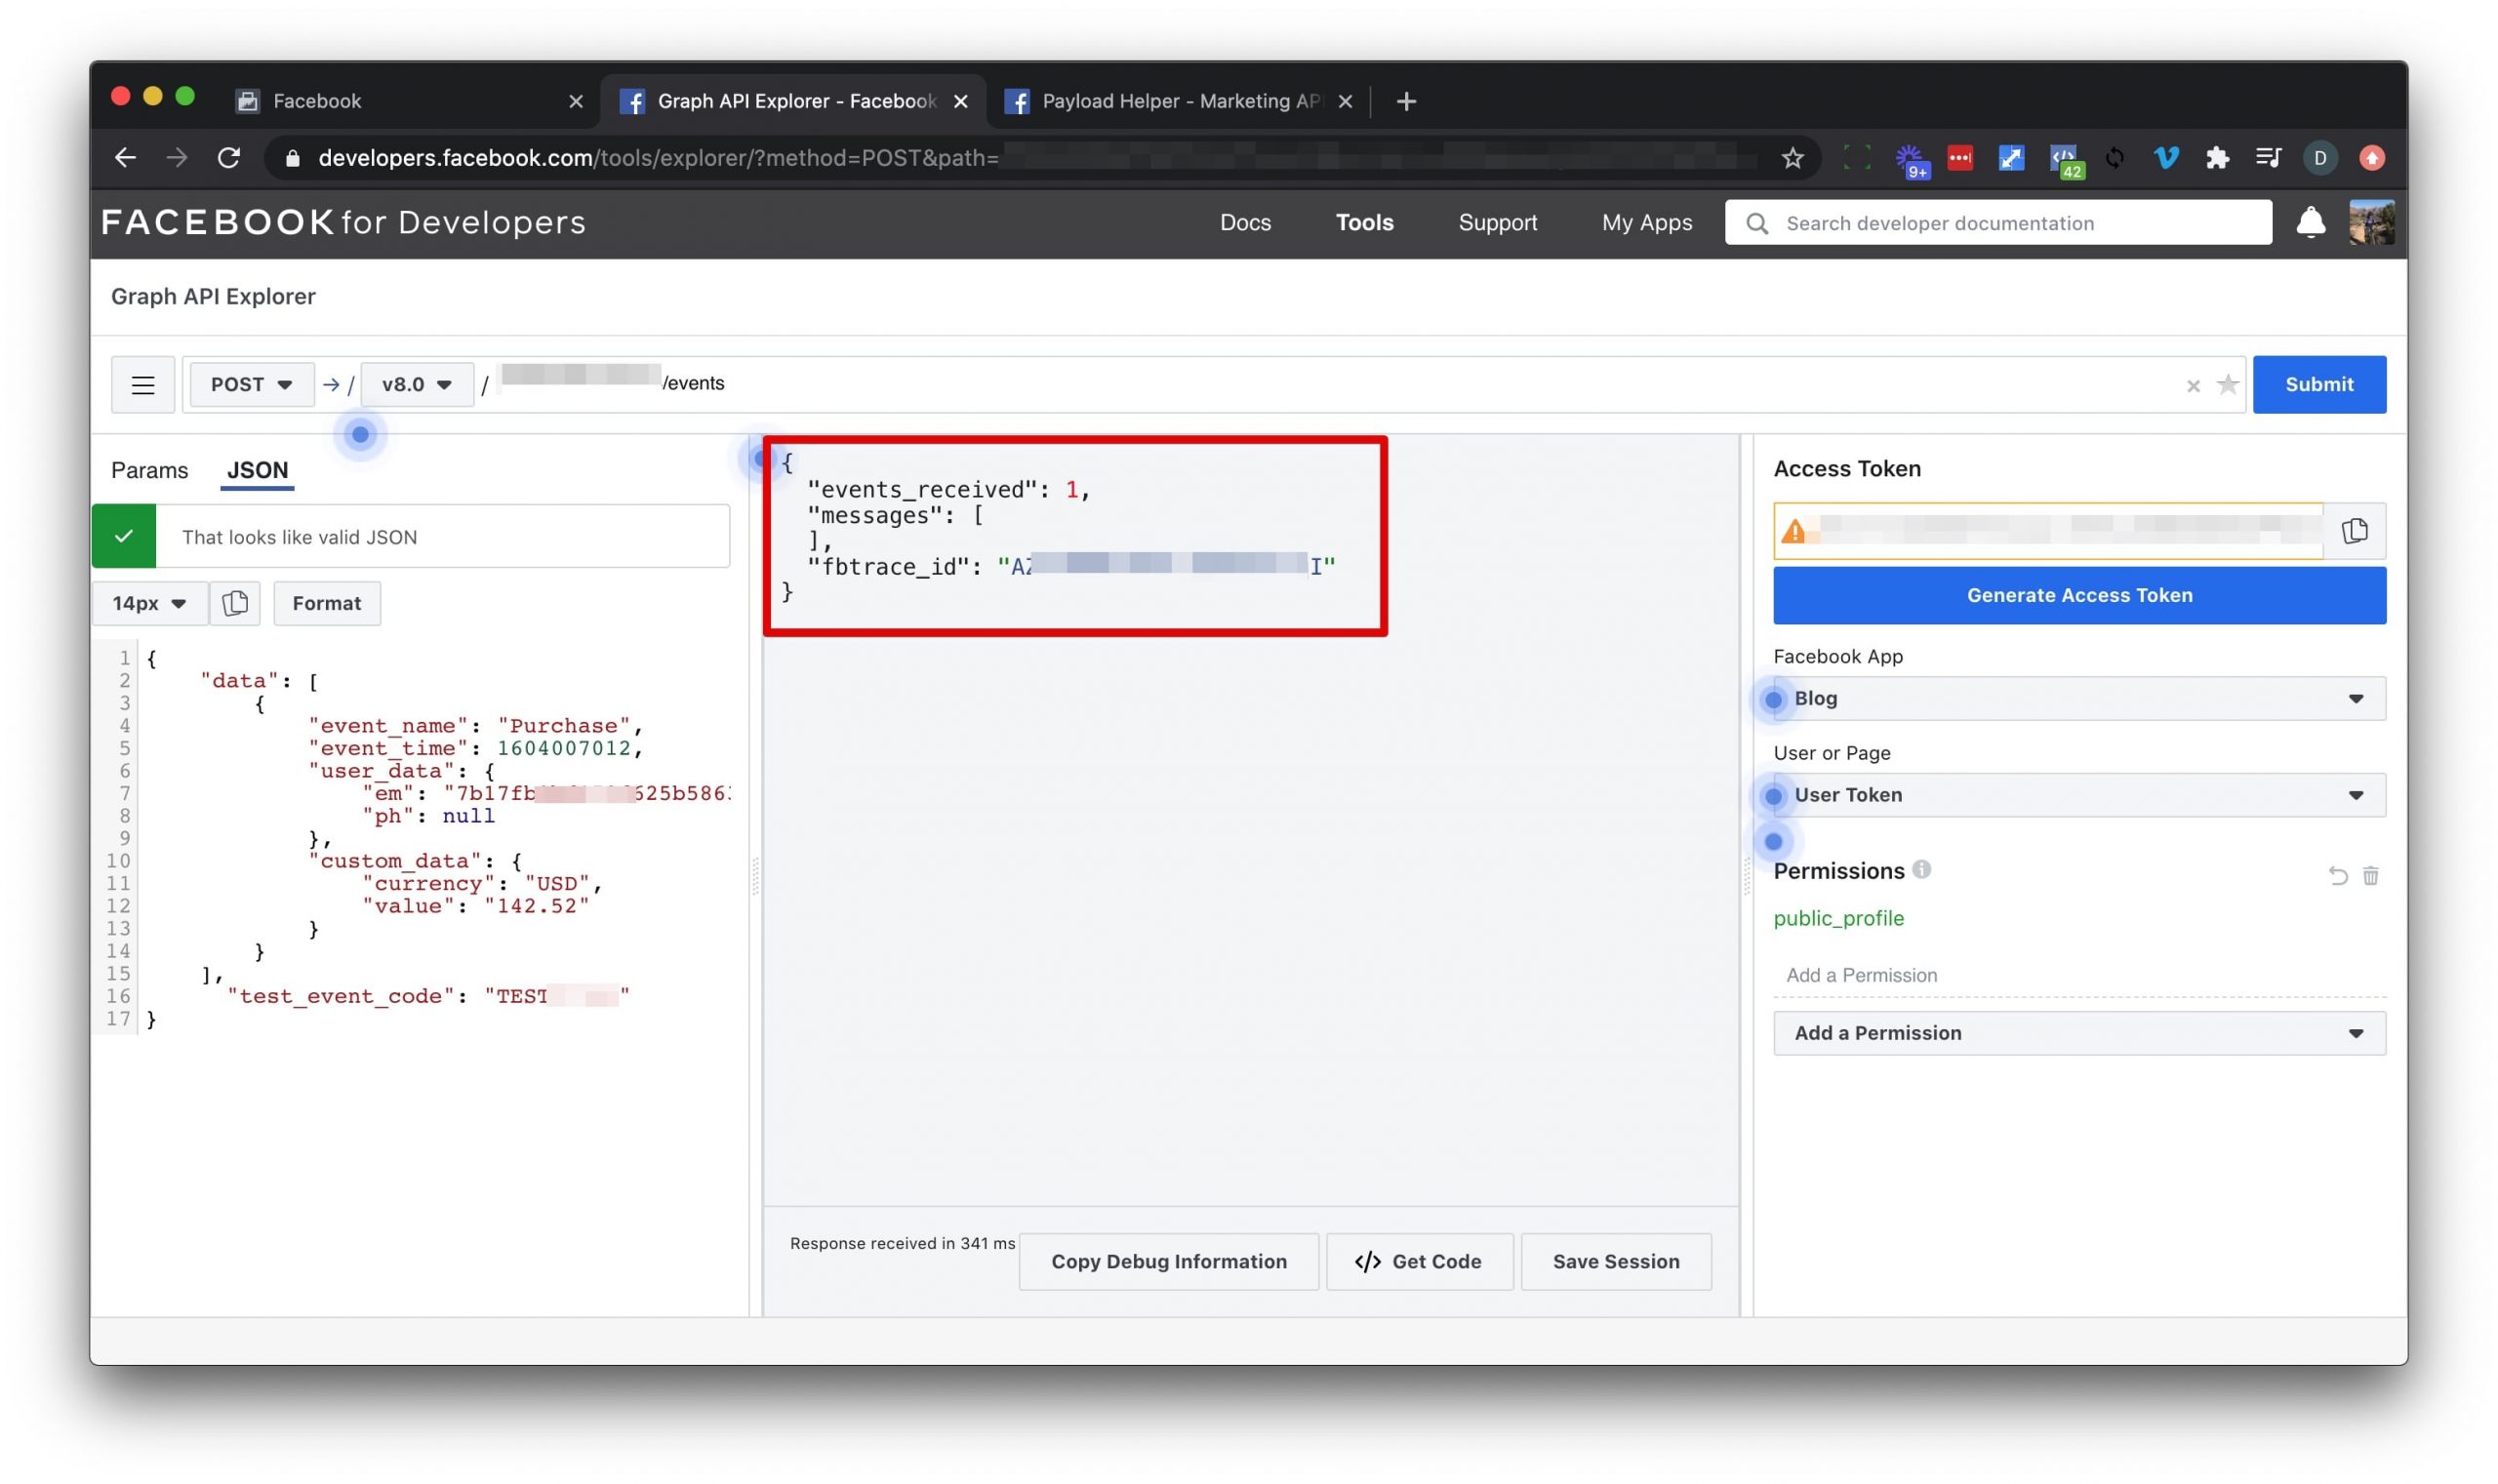
Go back to the Events Manager and confirm your first Conversion API call 🎉.

